


Processing backscatters using StarNet and the fplanglois GUI Starnet
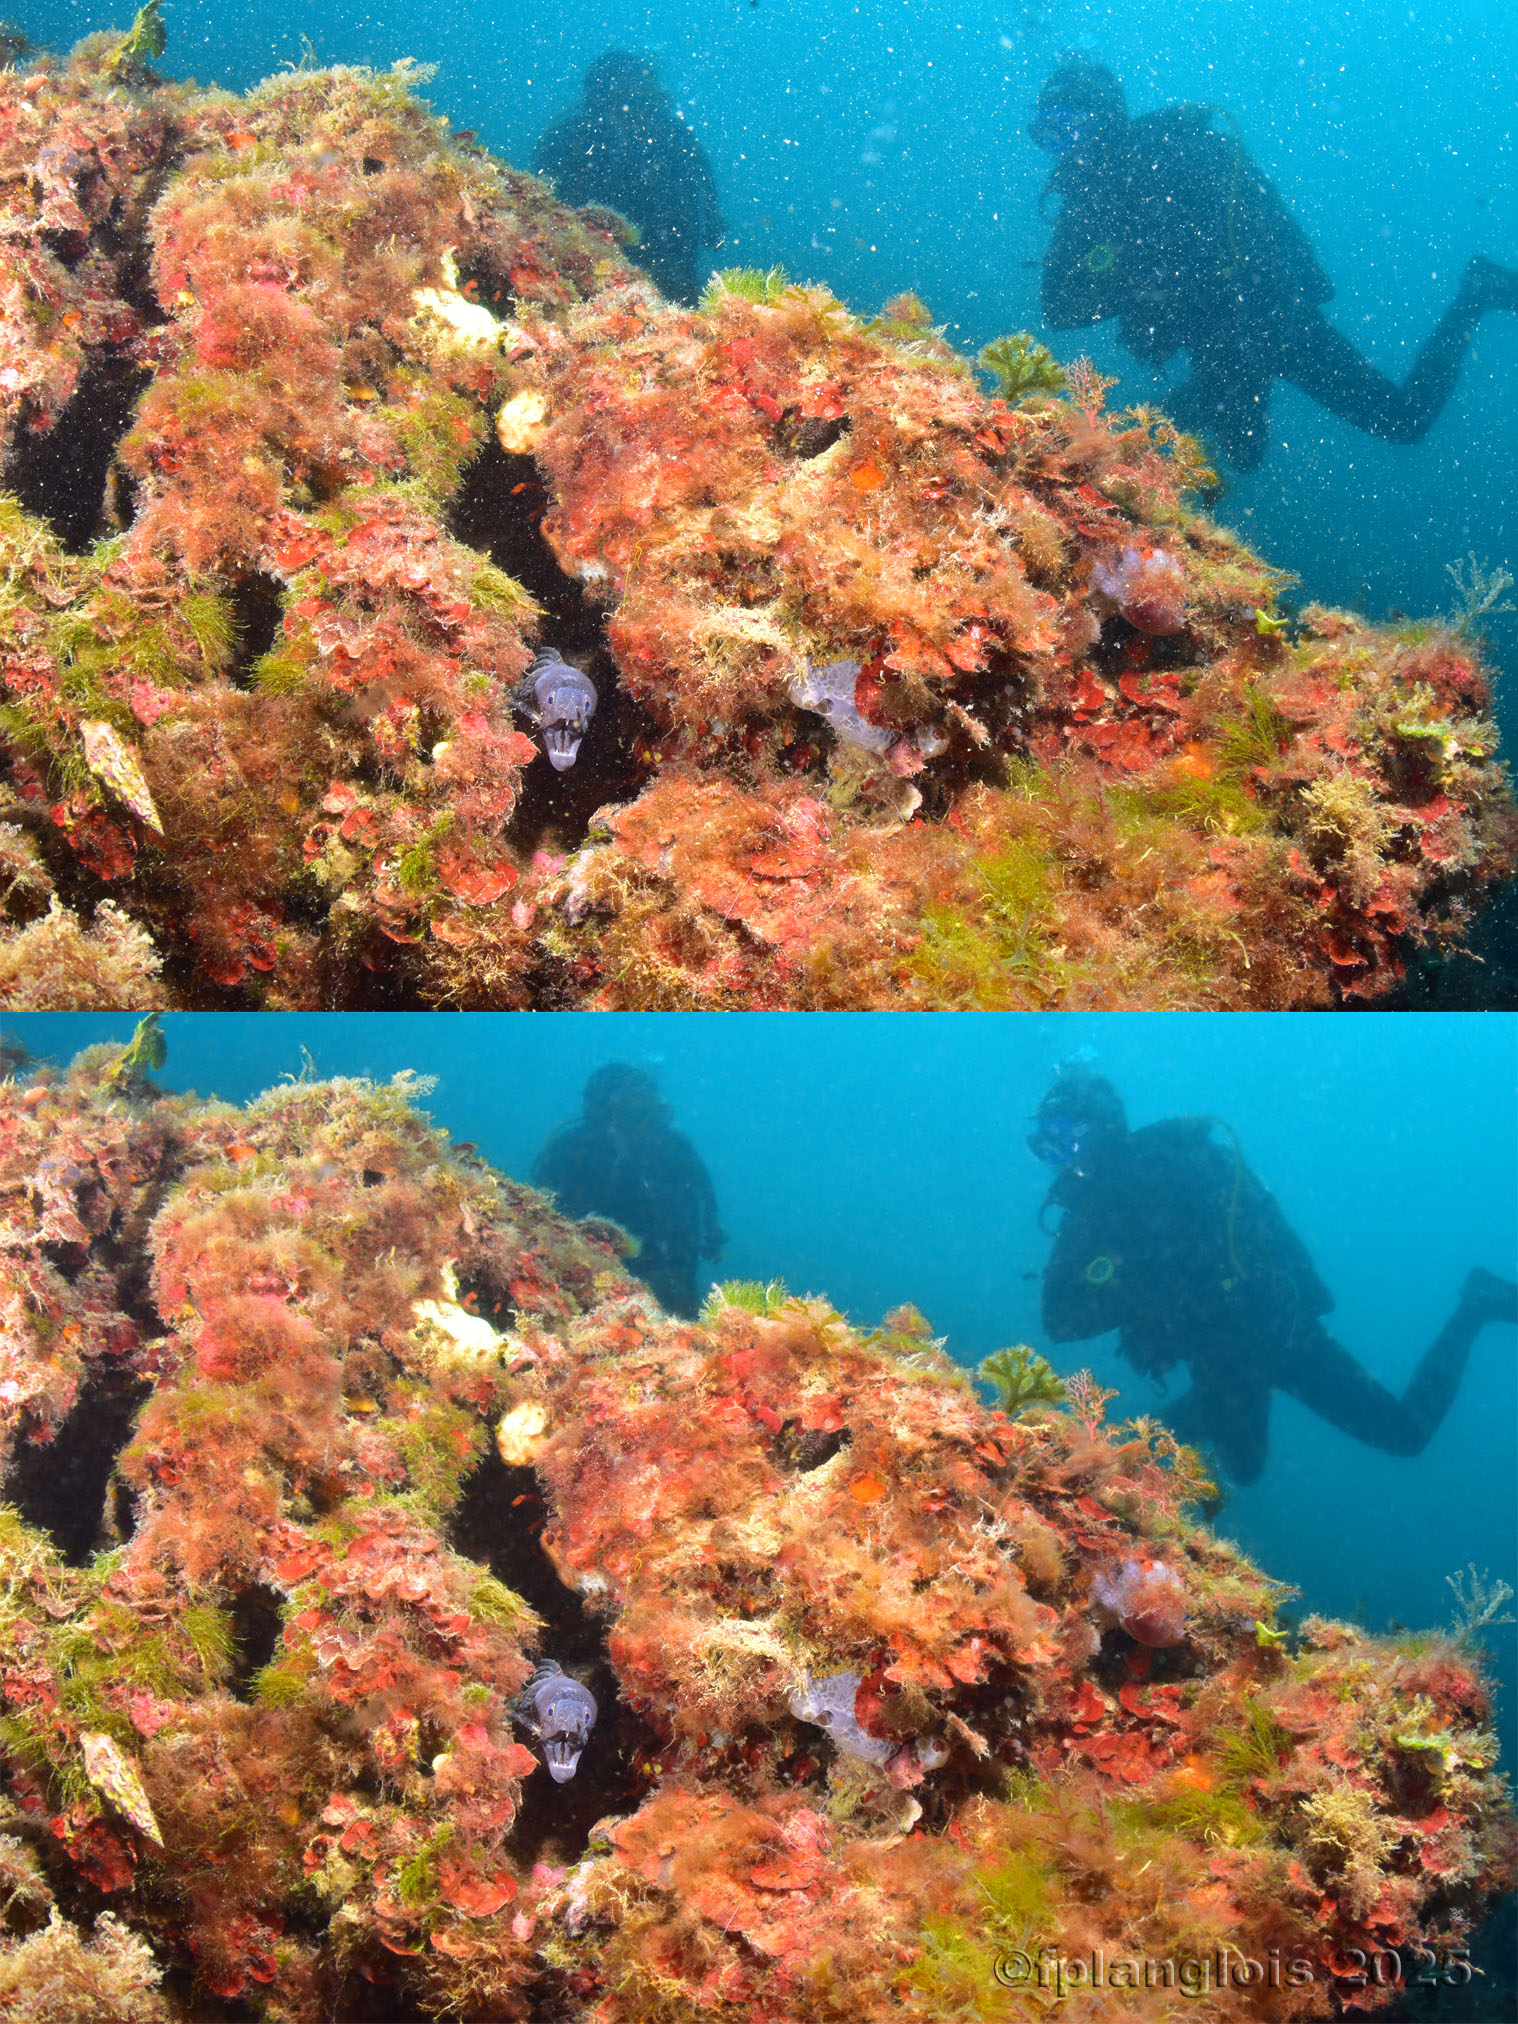
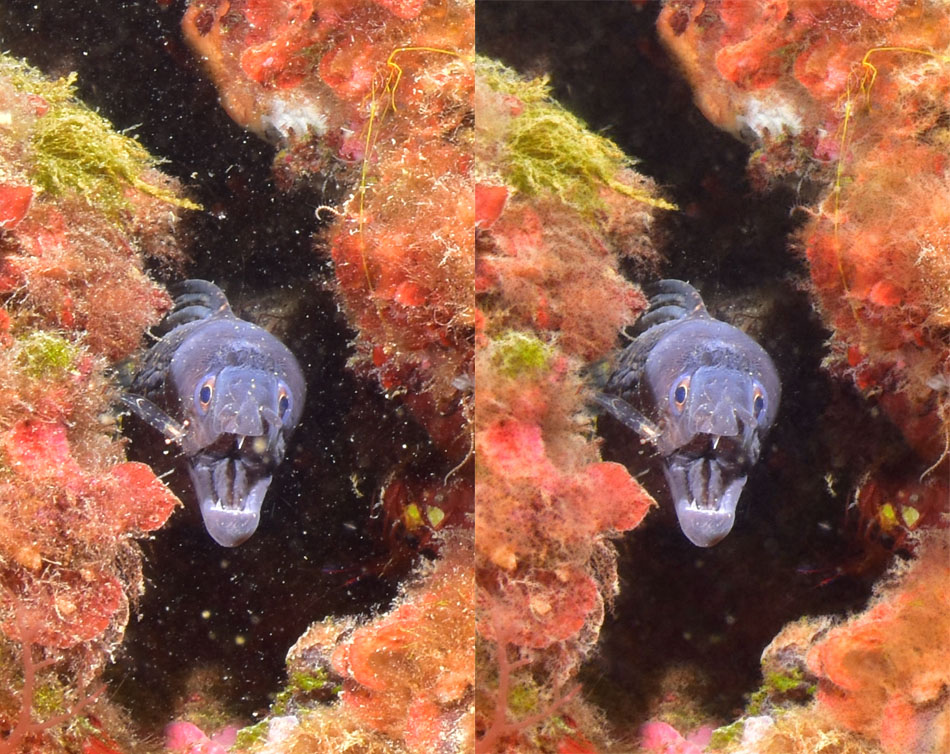
During a discussion in an underwater photography group, a photographer mentioned a test he had conducted using software designed for astronomical image processing.
He was using it in an unconventional way to remove backscatters from underwater images.
The software in question is called Starnet (https://starnetastro.com/); its purpose is to remove stars from deep-sky images.
At the time of this discussion in early 2025, the Windows version of the software was less refined than the Mac version (it only supported 16-bit TIFFs and lacked mask support).
Nevertheless, my initial tests were impressive. While removing backscatters from a solid background is relatively straightforward with standard image processing software (Photoshop, GIMP, Lightroom), Starnet works wonders on complex, detail-rich areas.
As we will see later, it is necessary to go beyond simple automatic processing with Starnet; while the results are spectacular, the process can be destructive in certain areas.
Another issue with Starnet is its usability. It is a program designed for scientists that runs via a command script.
In native mode, you have to write a script for each image within a batch file (.bat):
CHCP 1252
"C:\Users\fplan\Pictures\Utilitaires PhotoShop\starnet2\starnet2.exe" -i "C:\Users\fplan\Pictures\Utilitaires PhotoShop\starnet2\in\20260926_10h35mn09s.JPG" -o "C:\Users\fplan\Pictures\Utilitaires PhotoShop\starnet2\out\20260926_10h35mn09s_starnet_1.JPG" -s 256
pause
A graphical interface was indeed proposed. The one I tested was too basic, so I decided to develop my own for personal use.
Since then, the site https://starnetastro.com/ has released a plugin for the latest version of Photoshop, though I haven’t tested it.
Last month, I noticed that a new Windows version of Starnet had been released, featuring everything that was previously missing. I took the opportunity to update my own small application.
fplanglois GUI Starnet
The goal of the graphical interface I am proposing is to simplify usage, making Starnet accessible even to complete beginners.
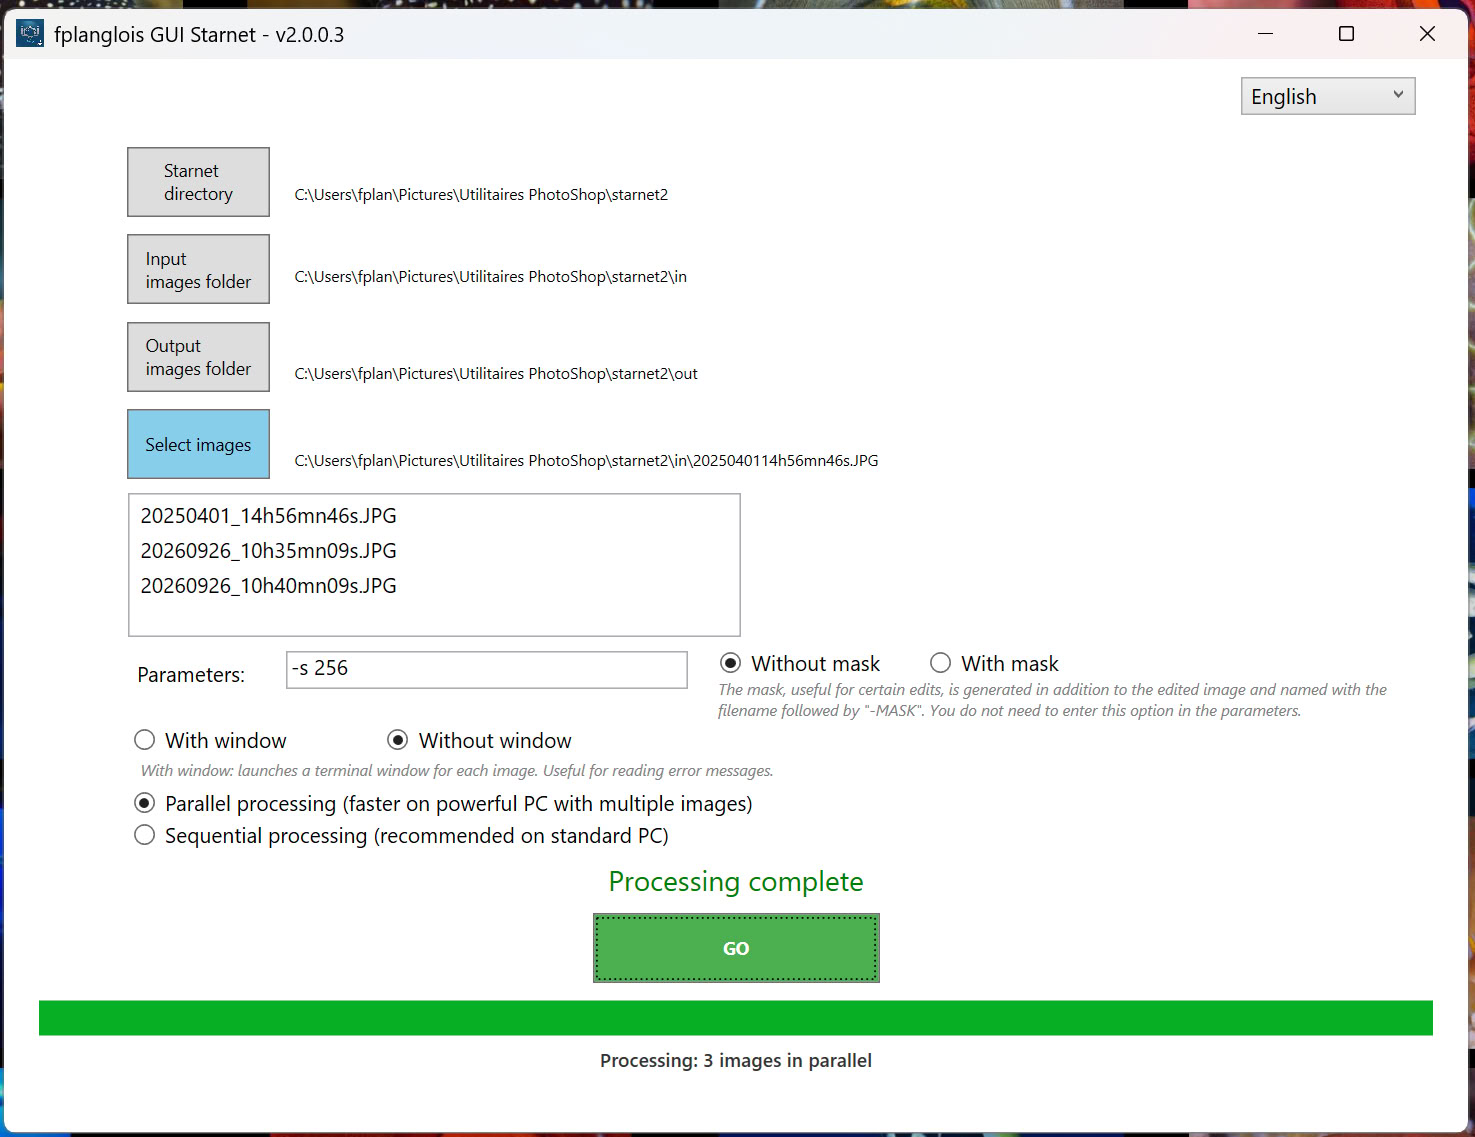

What the fplanglois Starnet GUI does:
This GUI (Graphical User Interface) allows you to automatically generate and run these scripts in a batch process for multiple images.
It also lets you save the necessary settings:
1- The directory where you have copied the standalone version of Starnet.
2- The directory containing the images to be processed.
3- The directory where the processed images will be saved.
It allows you to select one or more images using a file picker.
Finally, it launches the processing and displays a progress bar.
Other GUI functions:
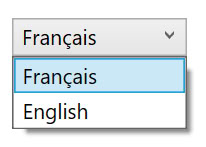
Language selection:
Parameters area:

Starnet manages a number of parameters. To learn about them, please read the Readme.txt file located in the Starnet directory. For our underwater application, only the mask parameter (see below) seems useful to me (for advanced use). However, the `-s 256` parameter must be set; the GUI does this by default. You can test certain parameters in the GUI's input field.
"With Mask" and "Without Mask" buttons:
The current version of Starnet can generate a mask of the detected backscatters (or stars, in its astronomical application). This mask enables a more advanced editing workflow (see method 2) than the one I will initially present (see method 1).The GUI simplifies the generation of these masks by providing a radio button that activates this feature without the need to explicitly add it to the settings area. The generated masks are automatically named using the output filename with the suffix "-MASK".
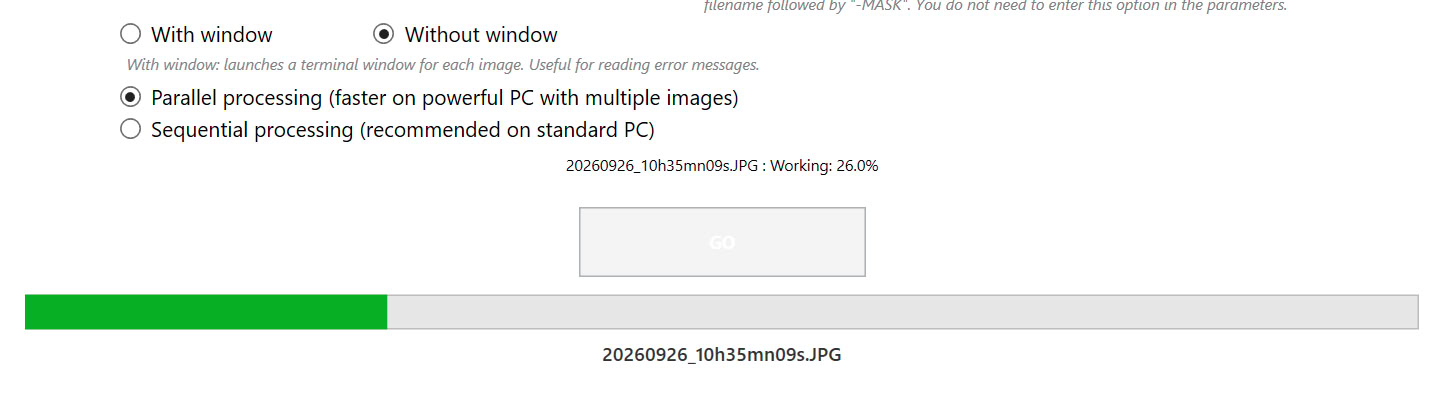
"With Window" and "Without Window" buttons:
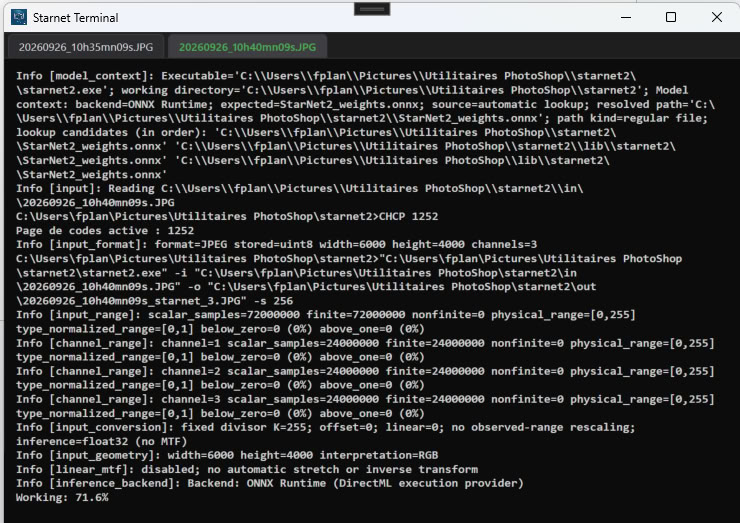
Generation may sometimes fail (though this hasn't happened to me in a long time). In such cases, it is useful to display all messages returned by Starnet persistently in order to analyze potential errors (this is how I discovered that the older version of Starnet only accepted 16-bit TIFF files).
Windowless mode displays all messages returned by Satrnet but quickly, which does not allow analysis in the event of an error.

The windowed mode displays a terminal-style window for each image, showing all messages without clearing the screen.
Parallel Processing / Sequential Processing buttons:
When processing a group of images, the GUI runs batches asynchronously by default; if the processor allows it, the images are processed in parallel. The time saving is substantial starting from three images.
But—be warned—this requires a powerful setup: a powerful processor, plenty of RAM, and a discrete graphics card (It's a technical term—let's say "powerful"…).
Starnet is a resource-intensive program that relies on neural networks (the foundation of AI).
The difference in processing time between a high-end PC and an older machine can range from less than a minute to over half an hour per image.
If you have a more modest PC, use sequential mode. The images will be processed one after another.
Retouch images that have been processed with Starnet.
With Starnet, all the backscatters (details below) have vanished as if by magic (full image):
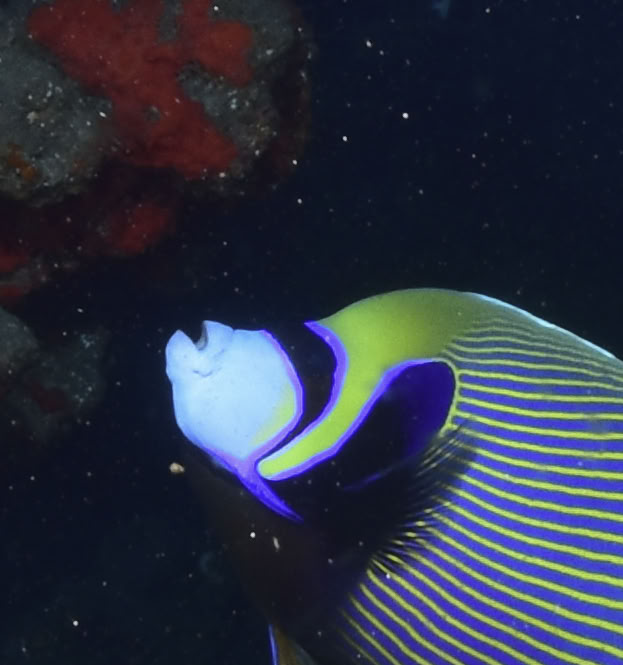
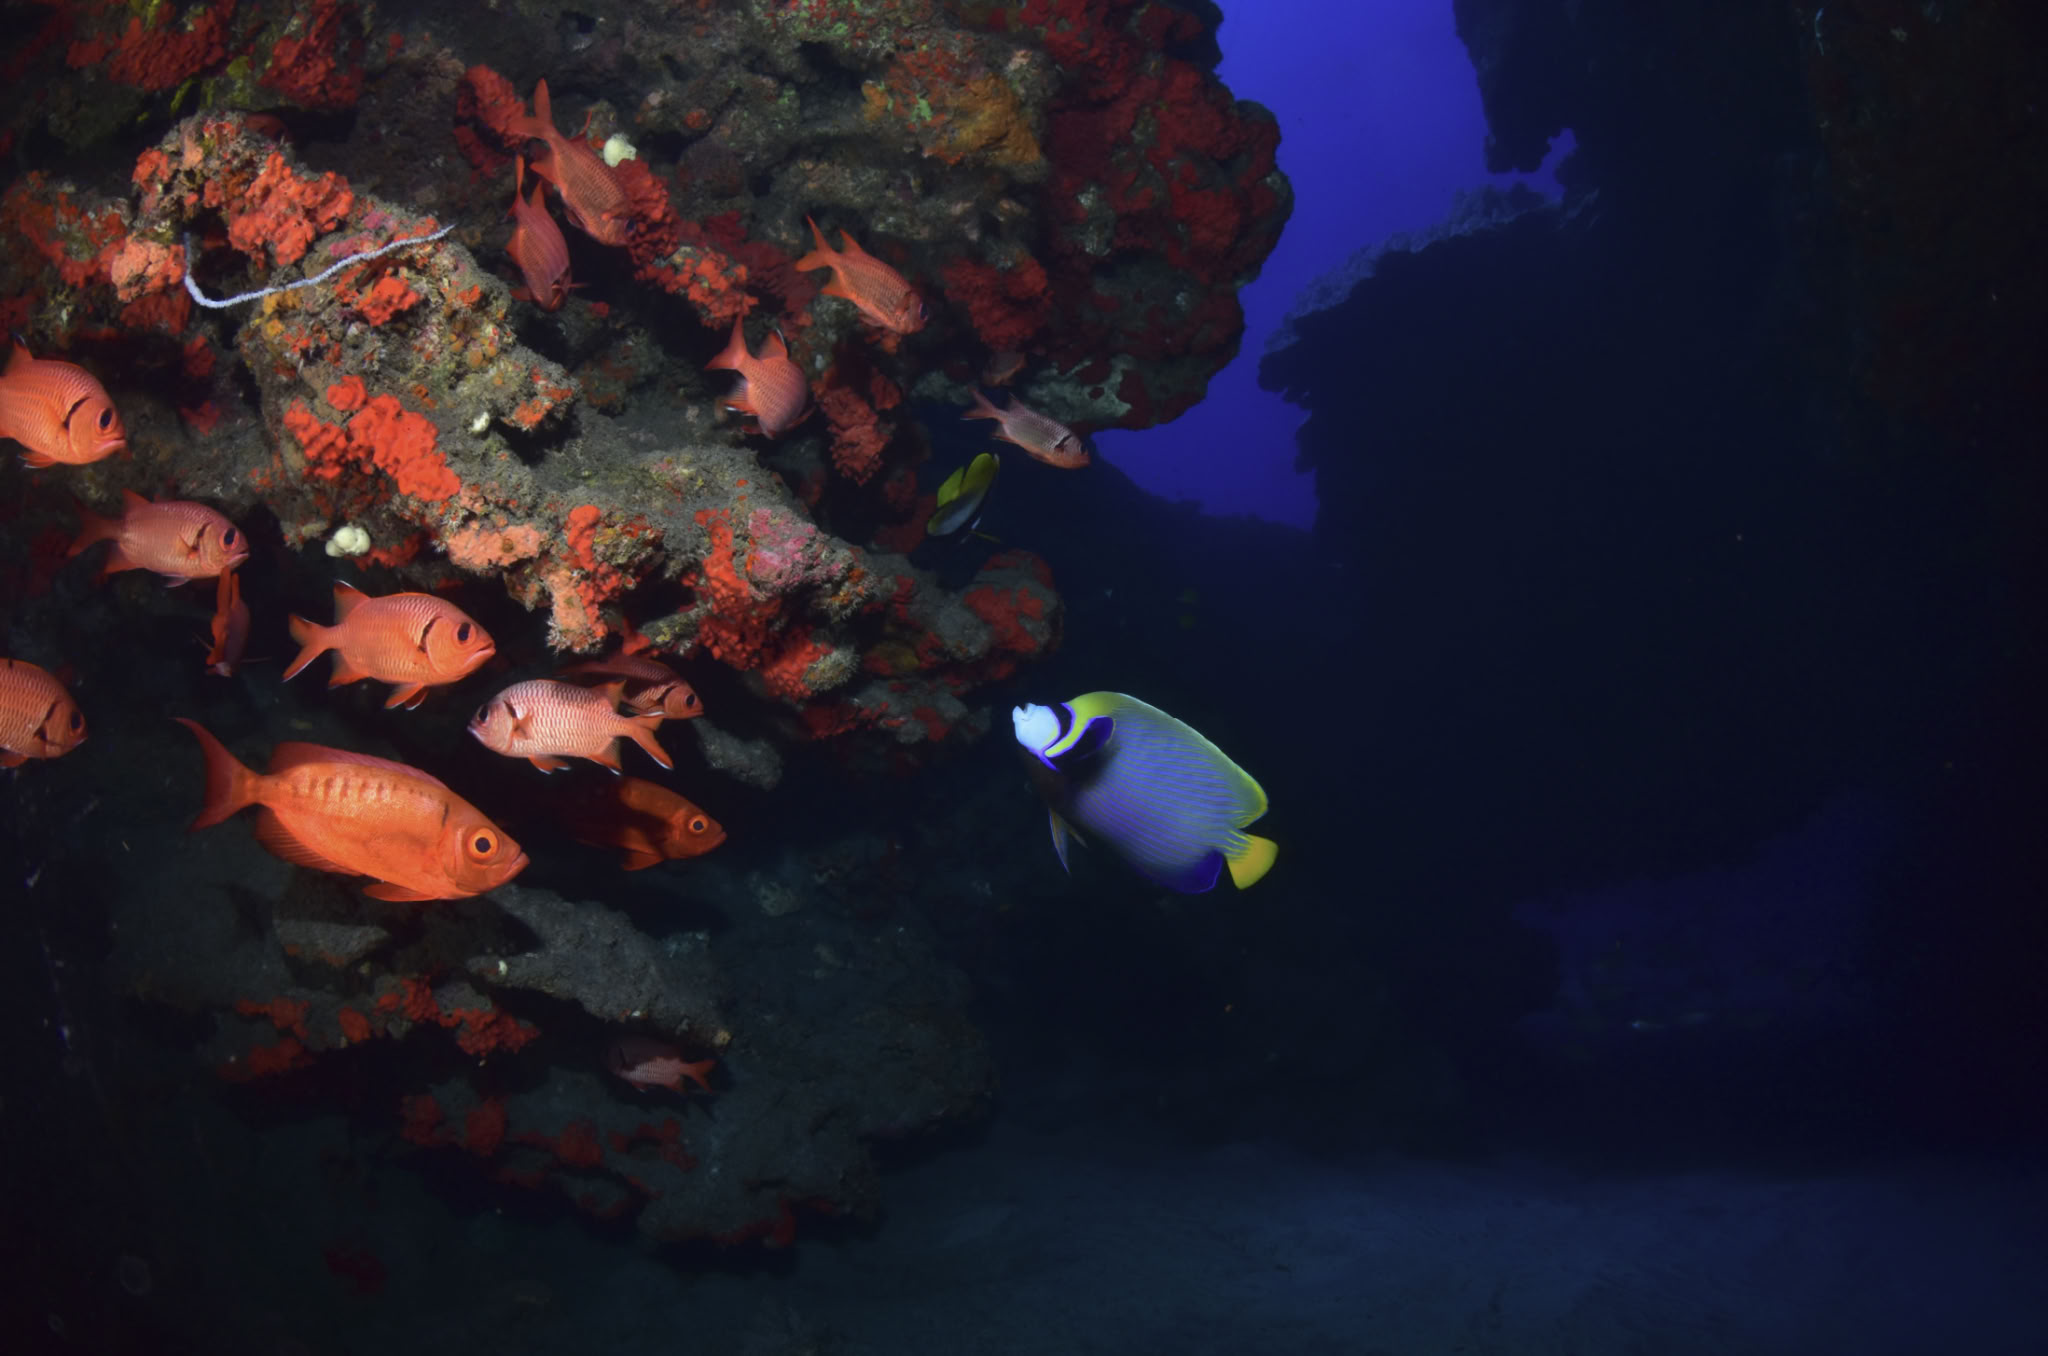
But upon closer inspection, the software detected backscatter in areas where none exist.
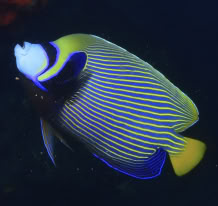
The angelfish has lost the structure of its scales:
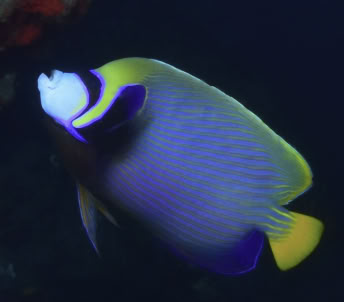
To correct this, I suggest using the first method, as it is the easiest to understand. Further down, I will revisit the second one, adding the Starnet mask processed in subtractive mode. However, this technique is conceptually more complex, even though the procedure is virtually the same.
Method 1
Retouching without using the backscatter mask
To process the image, we will use the original image and the image generated by Starnet (without backscatter).
For this example, we will use Photoshop. You can also do this using GIMP, which is free.
1- Load the original image into Photoshop.
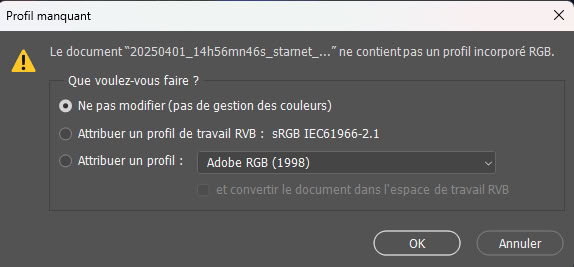
2- Load the star-free Starnet image into a second Photoshop tab. When loading, a message informs you that the color profile is missing.
This is because Starnet strips out all metadata. Apply the profile from the original image (sRGB, Adobe RGB, etc.).
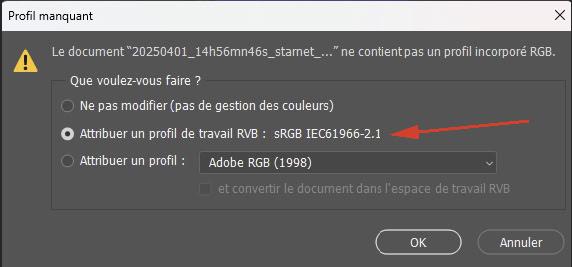
3- On the second tab, copy the entire image (Ctrl + A, then Ctrl + C).
4- Return to the first tab and add a new layer (Window menu -> Layers or F7).
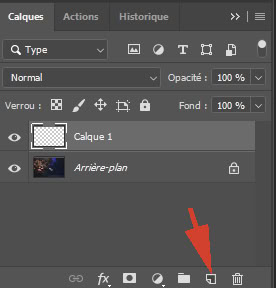
5- Click on the layer and paste the image.
6- Add a layer mask to the layer.
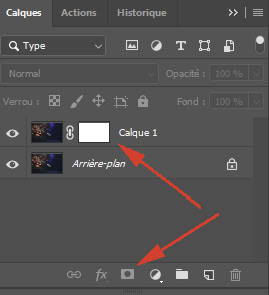
7- Activate the layer mask by clicking on the white rectangle.
8- Using the Brush tool set to black, paint over the fish that had lost its scales.
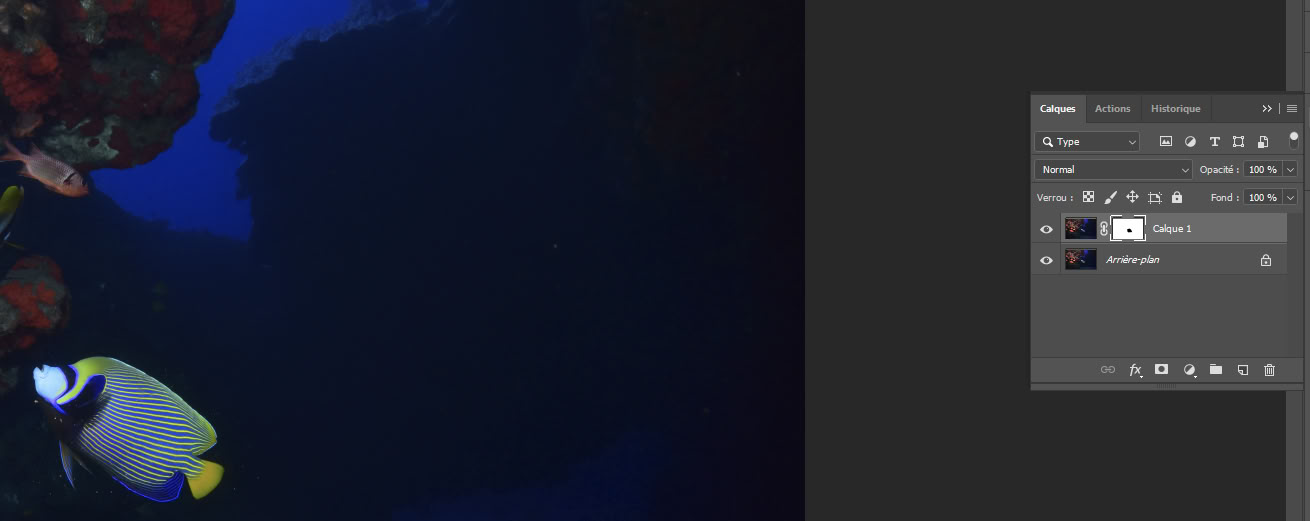
9- The fish does not turn black. It is the layer mask that shows a black spot appearing in the area corresponding geographically to the fish.
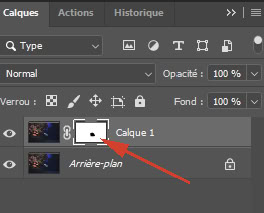
In doing so, you have created a gap between the top image and the bottom one. The fish, with all its scales, appears as if by magic.
.
10- It is very easy to do the same for the few areas that Starnet may have inadvertently smoothed out. By toggling the top layer on and off (using the eye icon), you can quickly spot areas needing a touch-up (fish eyes, coral polyps, etc.). These touch-ups are quick and, moreover, reversible. Painting with white on the image while the layer mask is active allows you to undo an unwanted brushstroke. You can thus revise these touch-ups as often as you like in a non-destructive way.
Method 2
Retouching with the backscatter mask
In this instance, we use the original image and the Starnet backscatter mask. The starless image is not used, though you might refer to it for comparison.
This retouching technique is more complex to understand and implement during the layer creation phase.
Fortunately, once this step is complete, the workflow remains the same.
So, why is it preferable?
In practice, you will notice very little difference. However, it yields objectively purer images; with the first method, the majority of the final image comes from a version processed with Starnet. With this second method, the reverse is true: only the backscatters retouching comes from Starnet, while the image background remains the original.
1- Load the original image into Photoshop in one tab and the mask generated by Starnet in a second tab.
When loading the backscatter mask, a message will appear stating that the color profile is missing. This is because Starnet strips away all metadata. In this specific case, it is fine to work with this mask—and only this mask—without a profile.
2- Create a group (Window menu -> Layers or F7).
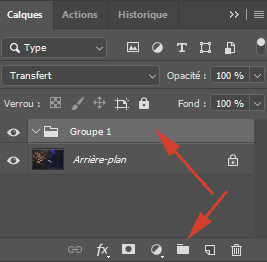
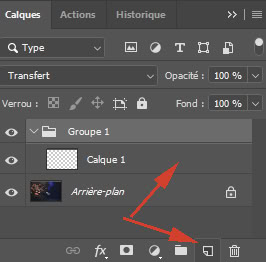
3- Click on this group and add a layer to it.
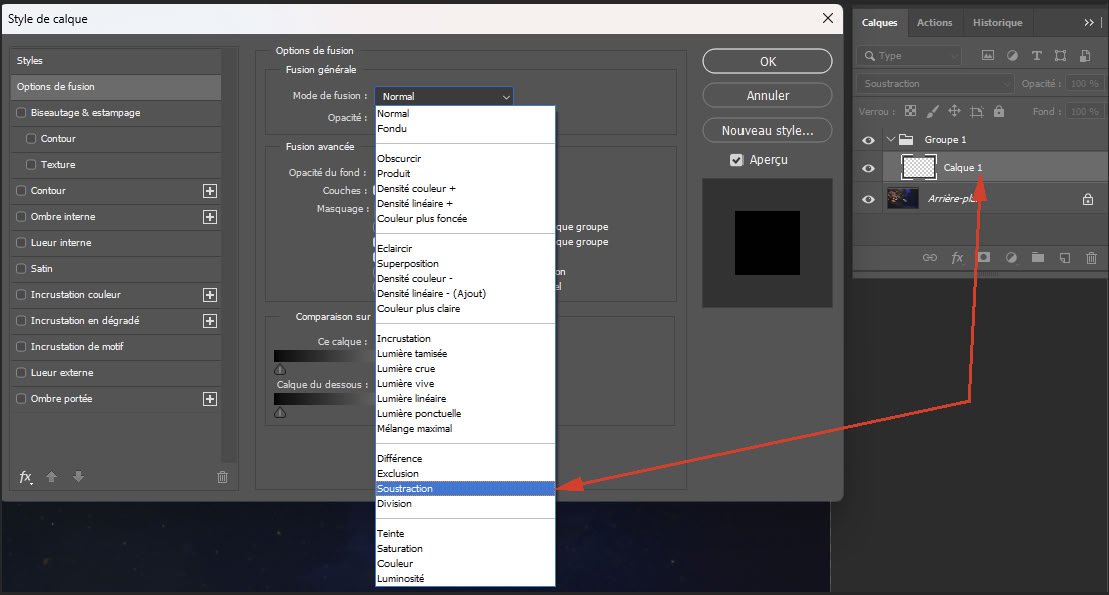
4- Double-click this layer to open the Layer Style window and select the “Subtract” blending mode.
5- Activate the second tab containing the backscatter mask from step 1.
6- Copy the entire mask (Ctrl + A, then Ctrl + C).
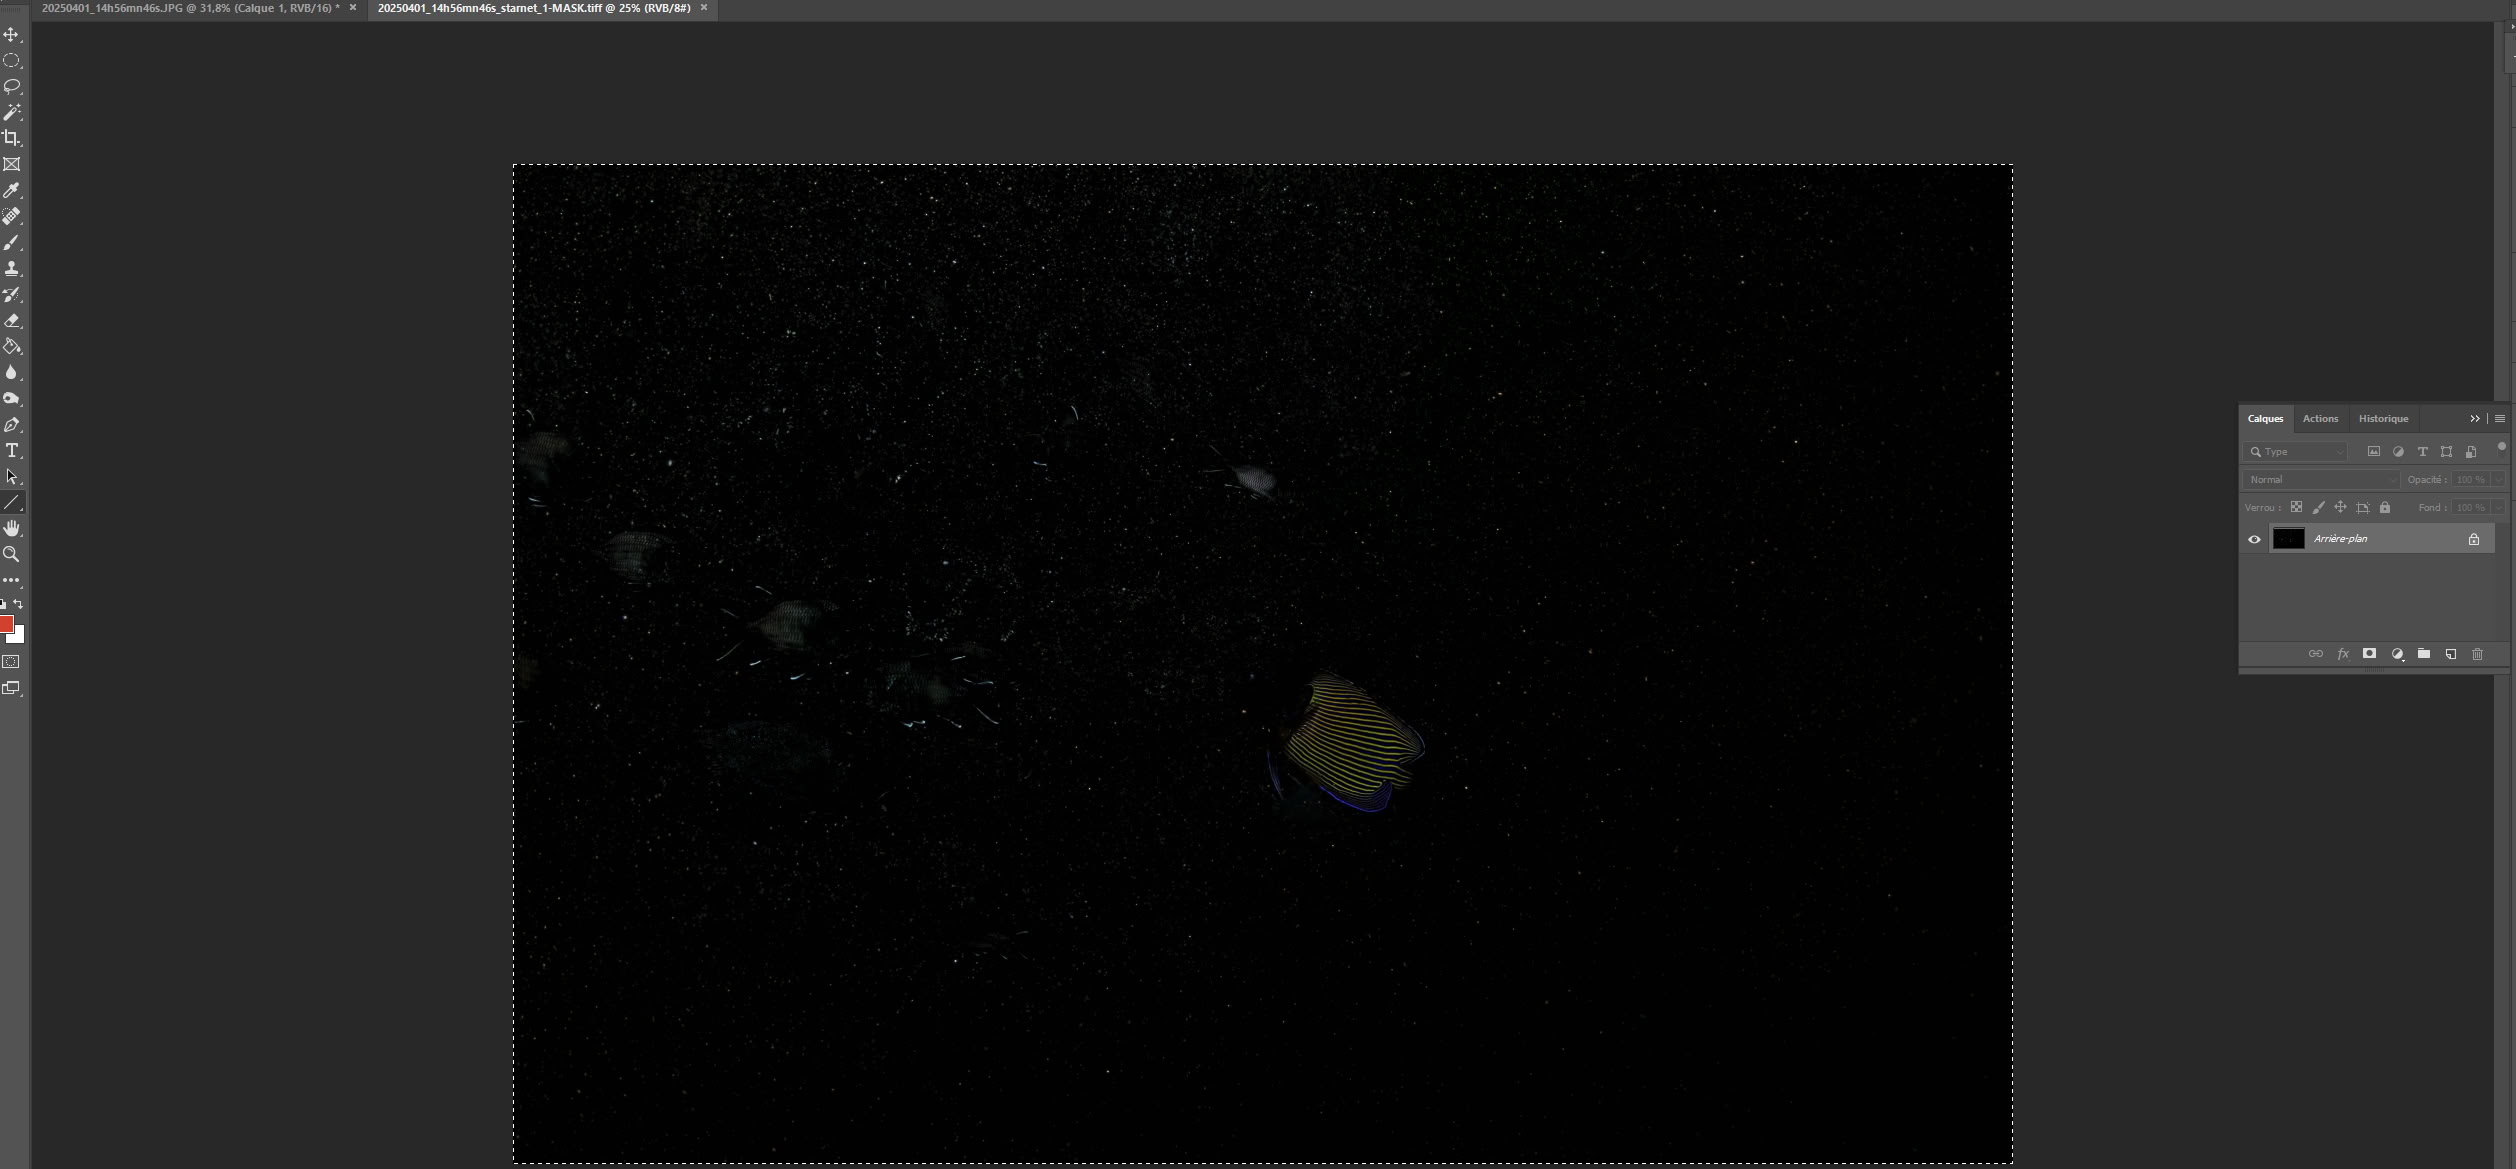
7- Return to the first tab and paste the mask into Layer 1.
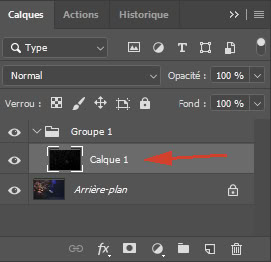
8- At this stage, the backscatters are no longer visible on your image. Click on Group 1 and add a layer mask.
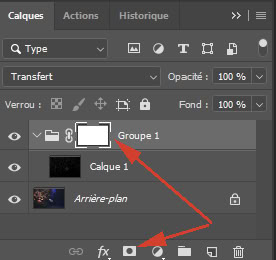
9- Using this layer mask, repeat the entire procedure from Method 1, covering steps 7 through 10 (painting on the layer mask).
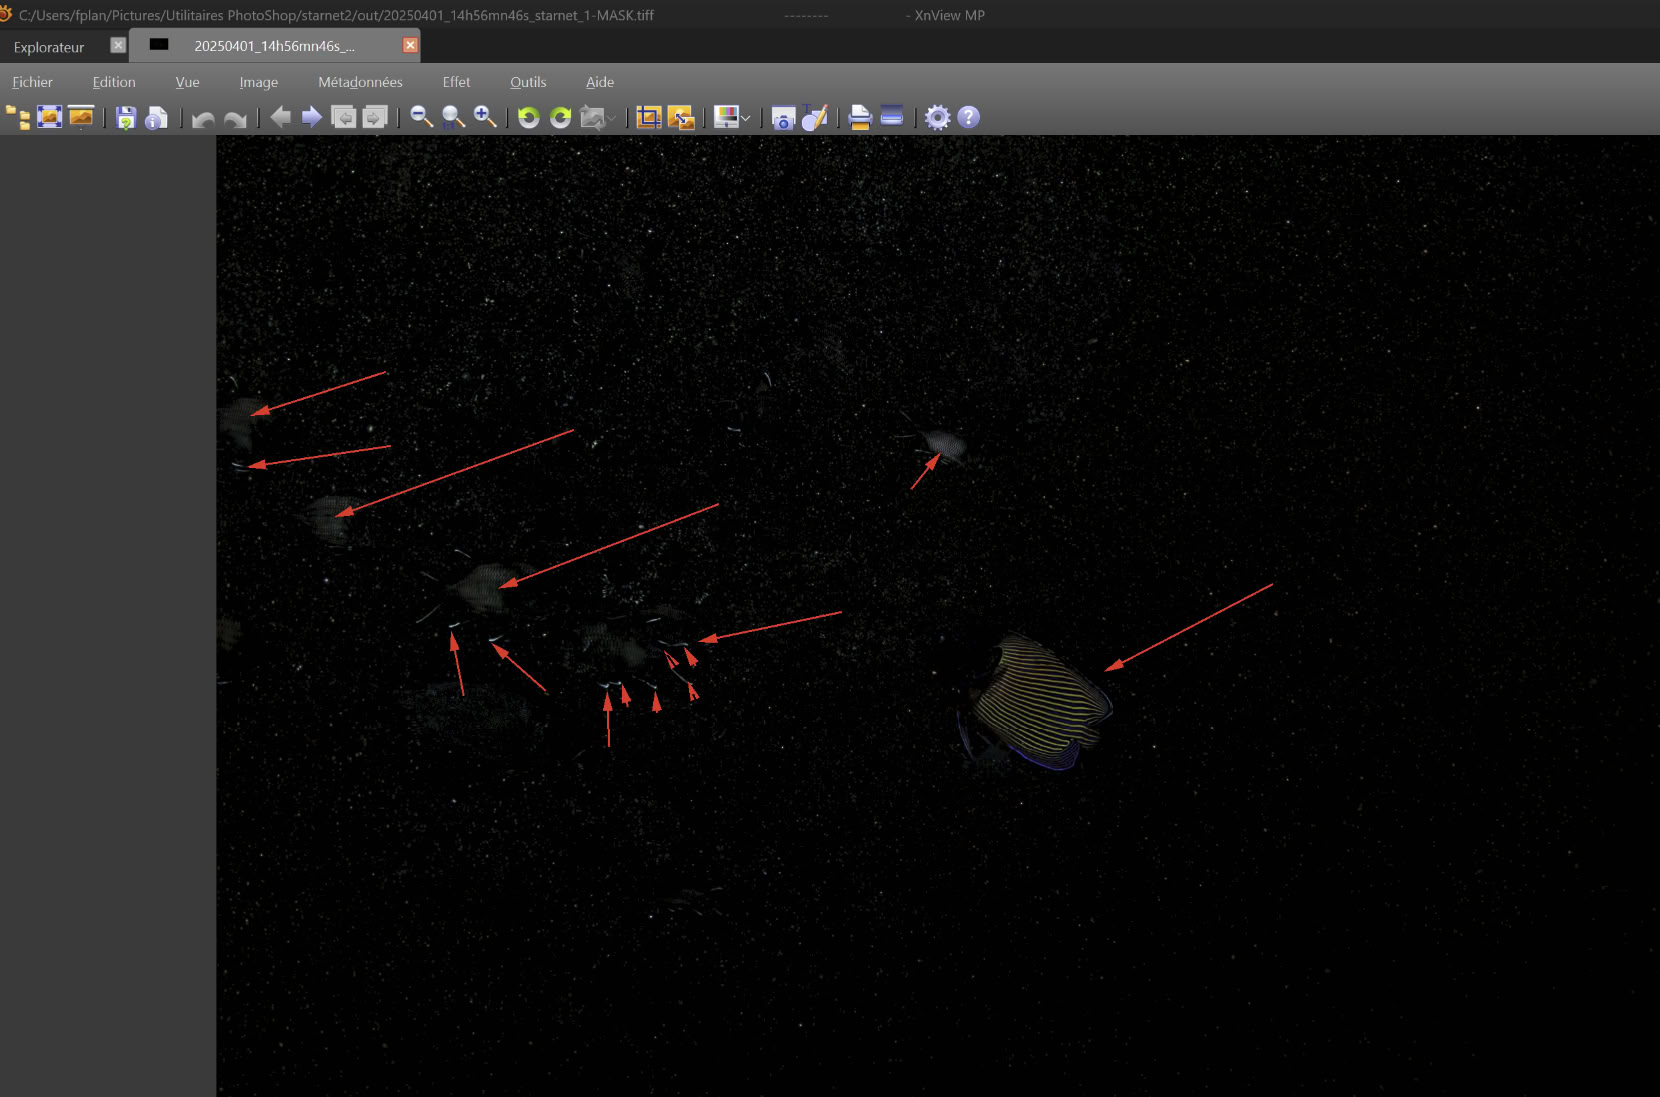
To carry out the retouching phase, you can view the backscatter mask in a separate window. You can clearly see the areas where backscatters were incorrectly detected: the angelfish and some fins and eyes of the goldfish. This is where you need to paint black on the layer mask.
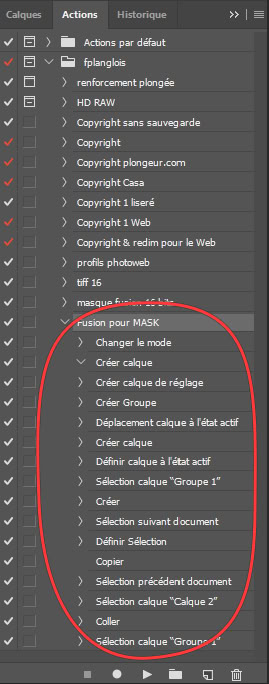
To automate the first 8 steps, create a Photoshop action that automates them after the image and mask are loaded (step 1):
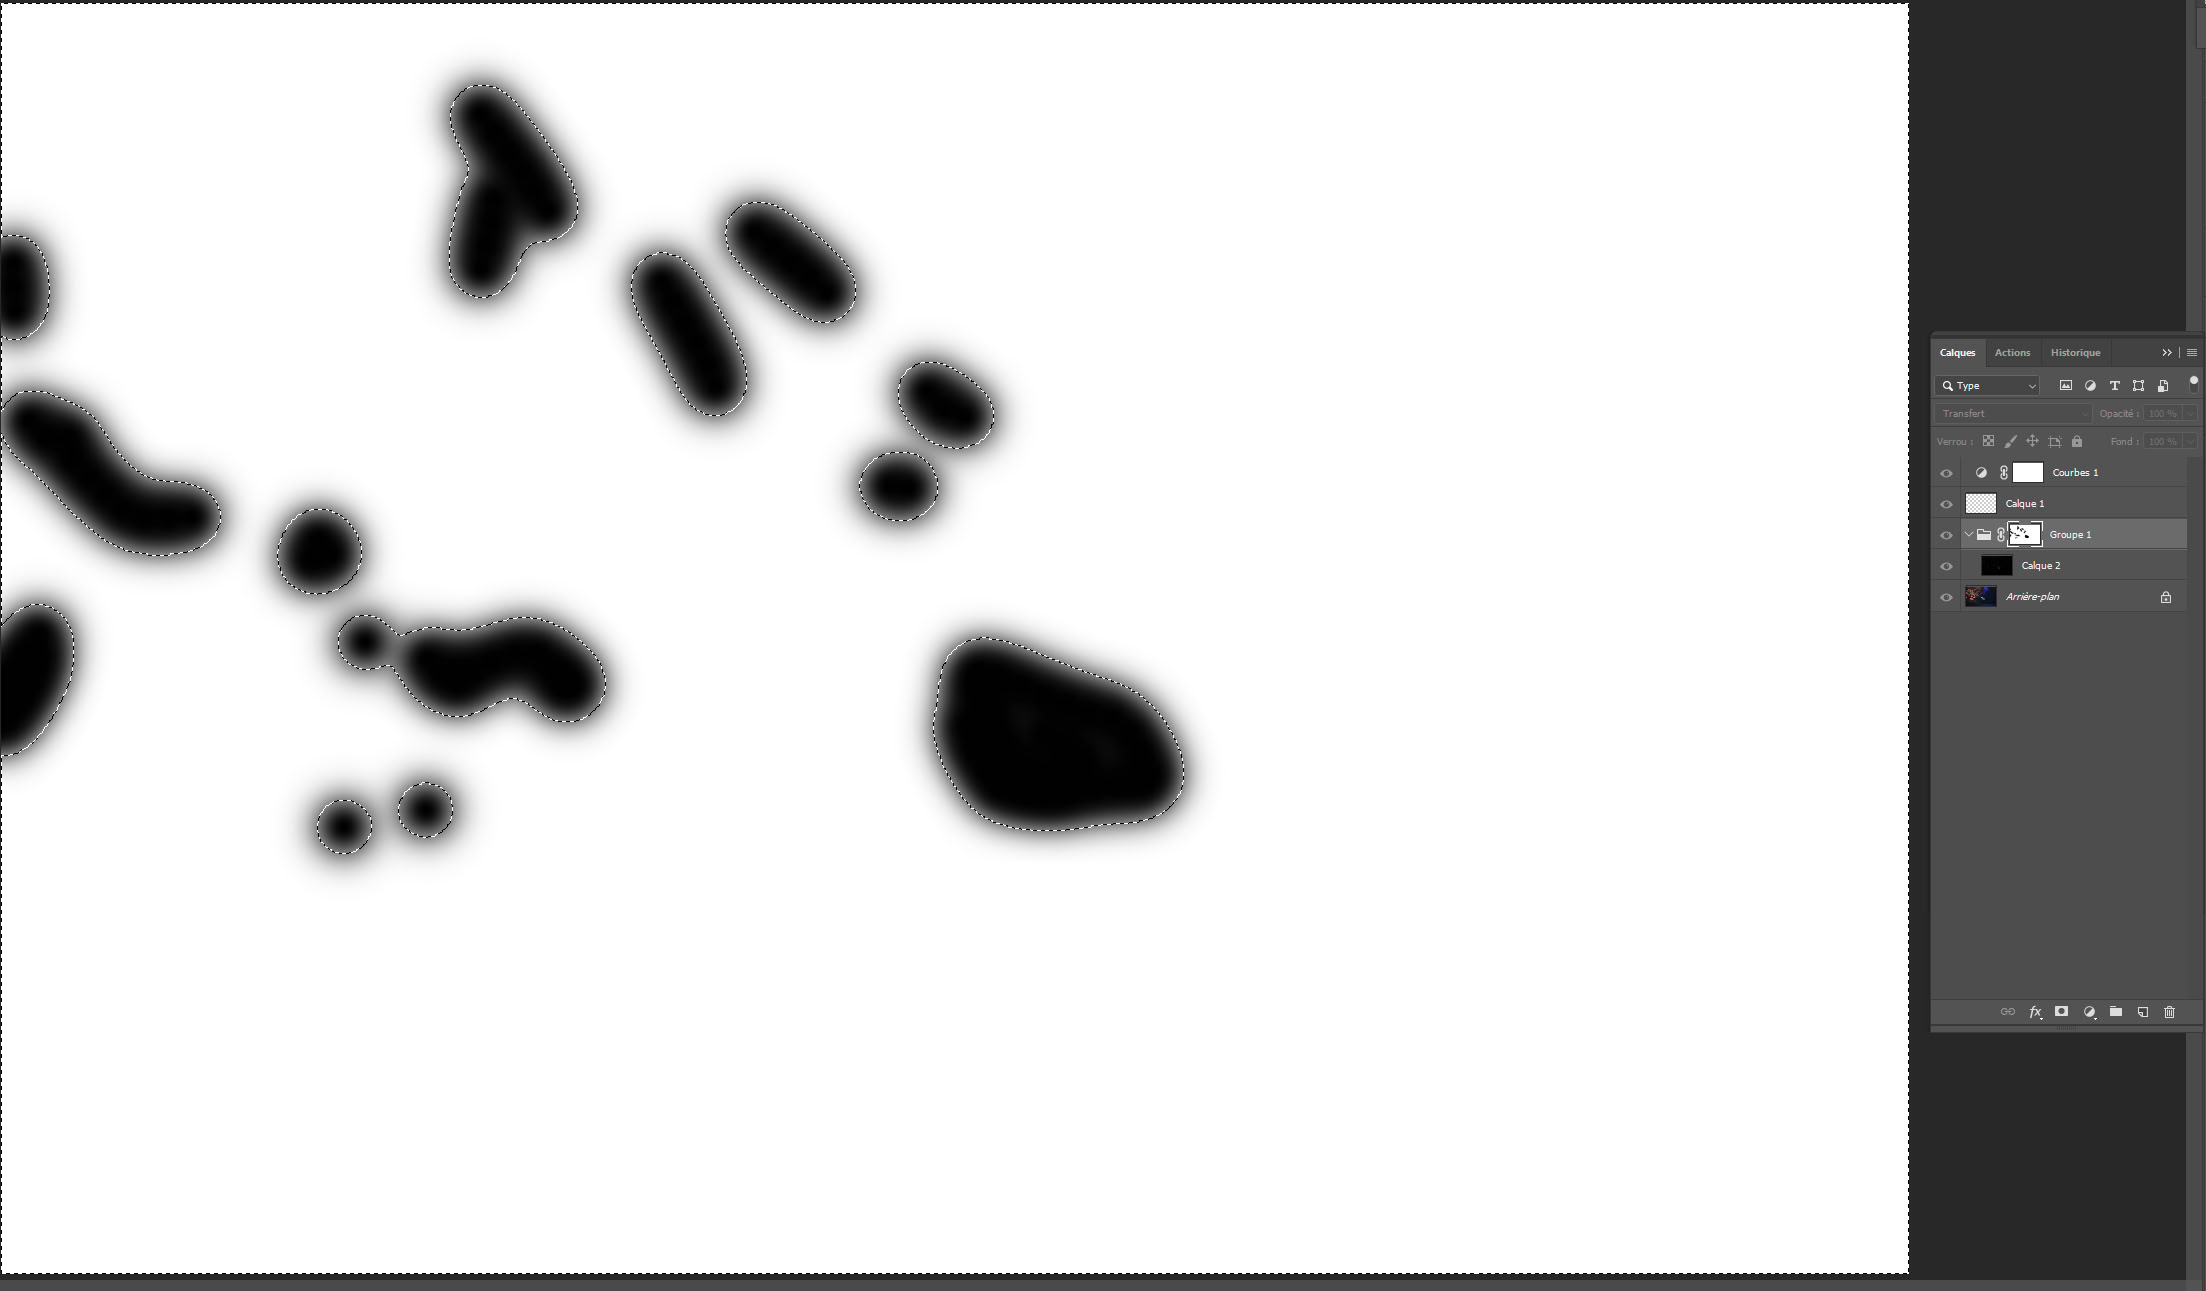
Here are the adjustments made to the layer mask. In this real-world example, the operation took 30 seconds:
Downloadable resources
The Starnet package used by this GUI can be downloaded here: https://starnetastro.com/cli-tools/starnet/
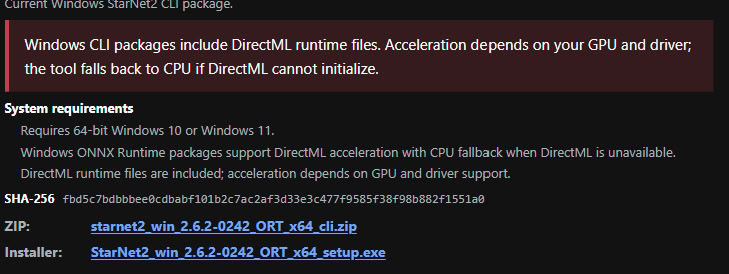
Download the ZIP file instead of the installer; this allows you to copy the entire folder to any location on your PC. Simply unzip it and copy the folder to where you want it.
The fplanglois program GUI Starnet
Download :
SHA-256 hash of the .exe file:
[5BBBC725E4D62930D2CF4F1405591A20C876530AF287ADA106E90F3803DF2437]
It installs using a simple installer.

An installation in French or English will be offered by default:
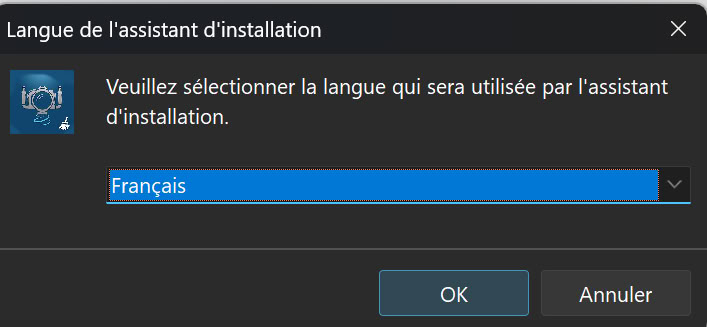
This doesn't matter, however, because you can switch between languages using this key combination: